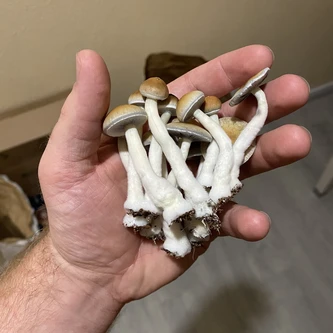
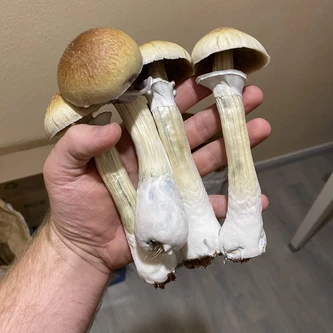
How to grow magic mushrooms
with(out) a pressure cooker 🍄
Using Throwaway's Patience Tek
- The reasoning for this tek
- A quick overview
- Preparing & sterilizing your grains jars
- Grain jar inoculation
- Spawning to bulk
- Fruiting & maintaining surface conditions
- After your first flush 🚧
- General tips
- Thank you's & references
1. The reasoning for this tek
After cultivating mushrooms for a while, and spending nearly all of my free time gathering information by reading books, Reddit or the Shroomery, I got kind of fed up with;
- Beginners thinking they need a pressure cooker (PC) to get into the hobby, or are forced to use rice. Looking at science, this information is simply wrong. This part will be the most controversial of the entire tek. You can skip to the explanation here. (Hint: it's not tyndallization)
- Answers from great cultivators back in 2002 that are now outdated. Even well known people like Paul Stamets have gone back on a bunch of things from his best selling books! This shows that even the best have literally done a full 180° on their opinions over the last twenty years. Completely normal, but pretty misleading if you're not aware of this. I mean, how many cultivators still think they need to keep their jars in the dark during colonization?!
- Successful cultivators telling you to do something but not why. I personally find this really important in learning the ropes of a hobby like this. Why do we soak for 12-24 hours? Why 12? Why 24? Why doesn't boiling your grain jars for a few hours get them sterile? Why can we expose the jars to open air when they're completely colonized? If you know why we do all the things we do, you don't have to follow a specific tek word for word since you know what's needed to get good mushroom harvests.
- Getting a good pressure cooker/canner in Europe is nearly impossible. People don't can over here. We don't even have a word for pressure canner. Every housewife forum in the Netherlands and Germany tells you to just bite the bullet and pay the $120 shipping for the "Presto Pressure Canner". On top of that, shipping easily takes a month or more. Every single one you find here is either tiny and/or goes up to 10 psi maximum. However, everyone and their mom has a soup pot that's large enough to fit a buttload of jars.
- I would've loved a complete document like this when I first started out. Sharing is caring!
If you ever have any questions, comments or just want to say thanks, you can reach me at [email protected]! I'll probably get back to you in a day or so. 😁
2. A quick overview
Growing mushrooms, be it gourmet, medicinal or magic almost always goes through the same steps. In this section I'll quickly outline what the process is so the rest of the document gets a bit easier to understand.
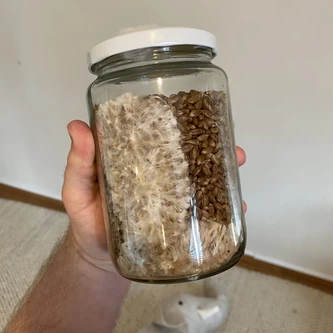
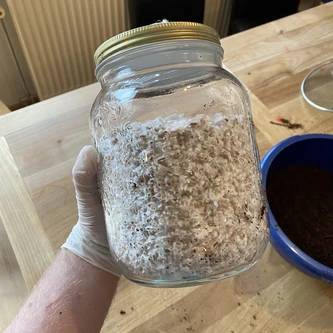
- First, we'll have to make jars filled with properly hydrated and sterilized grain. We need to make sure that we're only growing mushroom mycelium in there and that our mycelium has enough nutrition and water to become strong and healthy. Our jars need to be equipped with two things: a way to exchange gasses like oxygen and carbon dioxide, and a way to inoculate it with mushrooms after sterilizing.
- After the sterilization is done, we'll inoculate the jars with our mushrooms, be that through spores (not preferred, more on that later), a liquid culture or some other means - again more on that later. After the inoculation is done, we'll have to wait until the entire jar is filled with healthy mycelium. This is our mushroom spawn.
- When the jar is filled with strong mycelium, we'll "spawn to bulk" meaning we expand the mycelium covered grains to a bulk substrate. The bulk substrate provides little to no nutrition, but plenty of water for the mushrooms to start fruiting later on. Fruiting means the mycelium starts to grow what we want - the mushrooms themselves.
- After spawning to bulk, we only have to make sure the surface conditions stay nice and favorable, and they'll start pumping out mushrooms in no time!
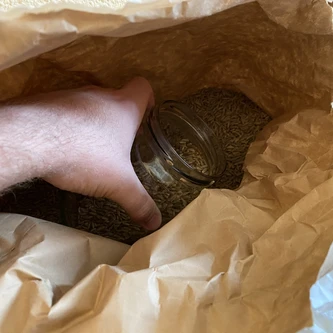
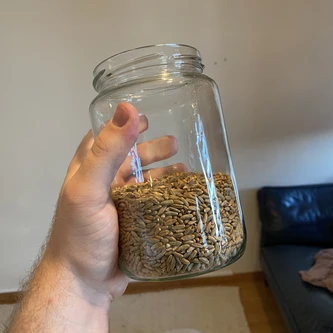
3. Preparing & sterilizing your grains jars
Requirements
- A couple of jars
- A pot or pressure cooker which fit those jars standing up
- A grain like corn, rye, wheat, barley, wild bird seed (WBS) or whole oats
- A colander/strainer
- Polyester stuffing material (polyfil)
- A drill or a hammer and large nail
- Some tweezers or pliers
- Tinfoil
- Patience
Steps
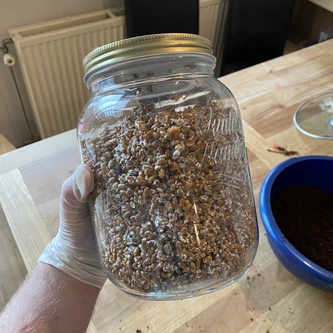
Preparing your grain is pretty easy. First you measure the amount of grains by using about half of the amount you want in your jars at the end, since the grains expand when hydrated. Try getting about 3/4th of your jars filled with hydrated grains. Fill it more and you'll have trouble shaking the jar later down the line.
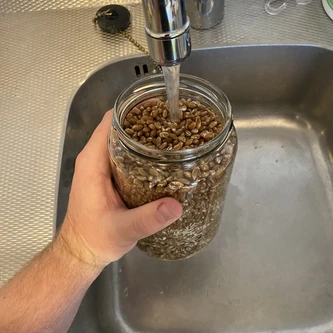
Next you clean your grain properly. This means that you rinse and rinse until the water that comes off is completely clean. You do this to remove any dirt and possible bugs that hide in between your grains. These can be a source for contams and will definitely make your grains stick together later down the line. This is something that makes shaking your jars a hassle. A general tip is to also check your water tap filter first. It's often just a screw-on at the end of the tap and can become pretty dirty after a while. Try giving it a quick rinse with some 70% isopropyl alcohol!
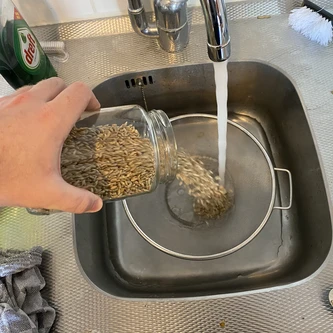
After having cleaned your grains, you dump them in hot/lukewarm water and let them soak for 12 to 24 hours. I personally find 16/18 hours to be a nice sweet spot. You soak your grains to soften them up for the boil that's coming, hydrate them with water a bit and to germinate the endospores. Endospores are basically just little bastard dormant bacteria that have evolved to be super resistant to heat. They wait until they've found nice, wet, favorable conditions and remove their "hard shell" to start germinating. You trick them by soaking the grains and sterilizing after. Soaking for more than 24 hours gives the bacteria time to thrive which really isn't something we'd like.
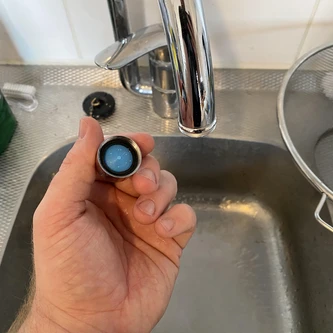
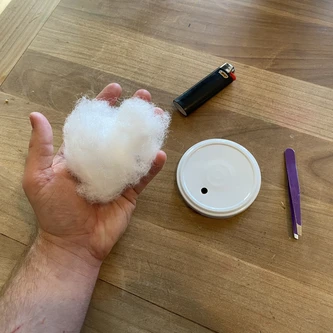
Having to wait a while, this is a good time to prepare your jar lids. This is why you needed the polyfil and the drill/hammer. There are multiple way to make jar lids:
- Micropore tape & self healing injection port
- Polyfil & self healing injection port
- Just polyfil
Your jars need two things really: a way to have gas exchange (GE) and a way to inoculate it after sterilizing. Gas exchange just means that there's a way for the mycelium to grab some O₂ and release some CO₂. This is different from fresh air exchange (FAE) on which we'll touch up later. I have always used polyfil for both GE and inoculation and haven't run into any problems.
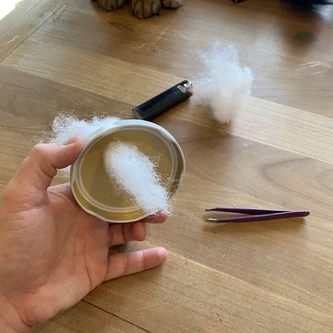
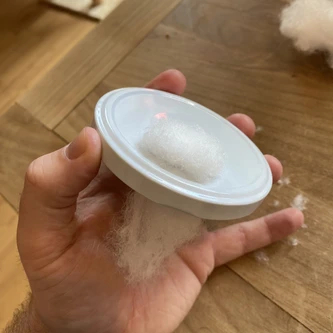
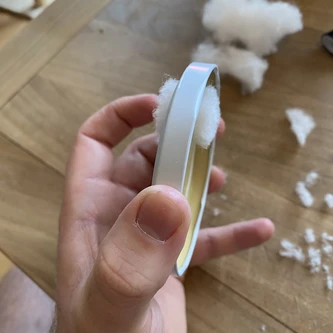
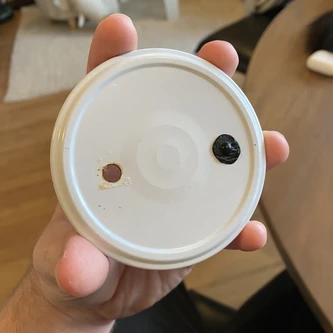
I use either a drill or a hammer and nail to punch about a 0.5cm hole into the jar lid. I grab a fairly large wad of polyfil. About the size of your palm and fold it up as much as I can. I then grab some tweezers/pliers to help me grab the polyfil and pull it through the hole. You want it pretty tight in there so don't be afraid to pull hard and redo it (with the same wad) if you didn't get right. I twist the polyfil on both sides and cut off the excess with a pair of scissors leaving about 1cm height of polyfil in both directions. The polyfil can still be a source for contams so you really don't want it touching the grains on the inside of the jar for long periods.
Two updates after a couple of years:
- I have since switched to adding a second smaller hole, about half the size of the other one and adding a self healing injection port using some silicone. I put a small dab on both sides and use a wet paper towel to dab the silicone into a disk shape. Let it cure overnight. If you start with the top side first, a small bump will appear there after doing the bottom side (video demo here). Be aware of the maximum temperature of your silicone. The lower the maximum temperature for the silicone, the softer is stays — meaning it will survive more stabs with a syringe — and the cheaper it is. For example; mine is rated up to 180°C, but you have ones that go all the way up to 1500°C. This is totally optional but I really like the confidence that it gives me when inoculating. If you happen to have some silicone laying around, I would consider adding this.
- I have also tried switching to 3M's micropore tape instead of polyfil for a while. And even with four layers on top of each other I would still get contamination after storing the the jar for a couple of months without inoculating. The contamination would always come from straight under the micropore tape hole while my polyfil control jars would stay clean. In short; I'm sticking to polyfil.
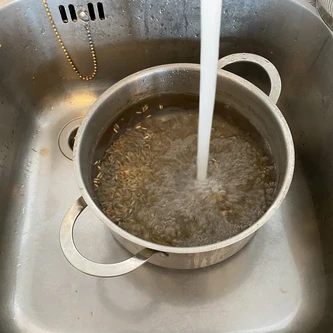
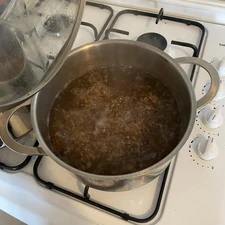
The next day, after the soak I like to replace the water once more (it'll be pretty dirty after the soak still) and give the grains a quick 5-45 minute boil on low heat. You want the grains to soften up and hydrate a bit more. Every five or so minutes just scoop some up and check how many are burst(ing). If about 5% of the grains are (starting to) burst, you've reached the maximum hydration and want to take them out. Another way of checking is to scoop some up and chew on one of them. You're looking for the grain to be chewy. Not hard, not soft and mushy but chewy.
The time for this boiling process really depends on the type (and quality) of grains that you're using. Millet can burst and turn into complete mush in a couple of minutes, while some popcorn can take the full 45 minutes easily before it softens up. Using high heat or boiling them for too long will make too many grains burst too quickly, which will in turn release a bunch of starch and make the grains mushy and sticky. Something you wanted to avoid.
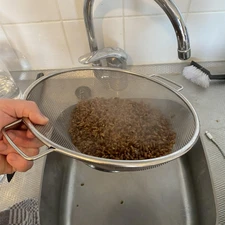
Another massive benefit to giving it a boil is that you're heating the grains up. Heating them up means that they'll dry really quickly after straining. You strain the hot grains and let them sit for about ten minutes to a couple of hours. This process really depends on the type of grain, amount of grains, and how much you fiddle with your grains to let the water evaporate. For example, millet often only needs ten to twenty minutes while oats often requires half a day. This is the reason why I personally dislike using oats, even though most cultivators swear by them. If you were to spread the grains out over a large area they'll be done far quicker. Some people even use window screens specifically for quickly drying their grains.
What you're looking for, is for the grains to be near dry on the outside but completely soaked with water on the inside. This is really important. Having grains that are too wet will leave your jar with wet rot in a week or two. If you're not completely sure — you're better off having grains a bit on the drier side than on the wet side.
You can test the dryness of your grain in two simple ways:
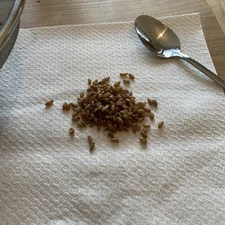
- Grab a (dry) metal spoon and spoon some up. Now rotate it by 90 degrees. If all (except for maybe one or two) grains fall off the spoon, it's perfect.
- Grab a paper towel and throw some grains on there. Wait ten or so seconds and pull the paper towel up. If the paper towel doesn't have any wet spots the grain is perfect.
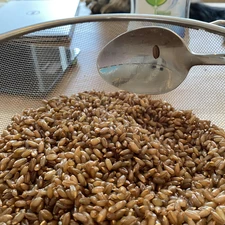
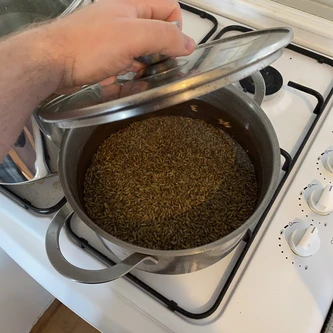
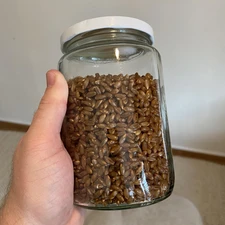
After you've confirmed your grain is perfectly hydrated and not wet on the outside, you scoop it into your jars. Again making sure not to fill them up too full because you'll regret it down the line. I prefer to give my jars and their lids a quick cleanse with some 70% isopropyl alcohol and some paper towels before filling them up with grain. Be sure not to get the polyfil wet since this can invite contams.
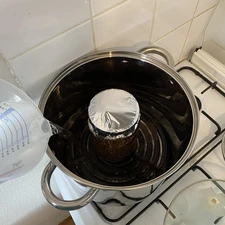
After your grain jars are all filled up, twist on the lids tightly and grab some tinfoil. Make sure the rims of your jars and lids are clean when twisting them on. Use a small piece for each jar and cover the lid with the tinfoil. The jars will go into the pot soon and water will drip down on them. Not having tinfoil in place will cause the water to drip onto the polyfil, into the jar and offset the water contents.
Sidenote: when screwing on the lids, make sure the polyfil on the inside of the lid isn't wedged between the seal of the lid and the jar.
This is the part where the patience (and controversy) comes in. Like stated in the beginning this is also a no pressure cooker tek. When scouring the shroomery.org I learned that RogerRabbit, one of the best (commercial) cultivators on the forum steam sterilizes in huge batches using a self made steam oven. The thing is that endospores — those small bastards — survive a couple of hours at boiling temperature. They however do die from nine hours of steam sterilization (at water level).
The sterilization table can be found here. RogerRabbit's post saying nine hours of steam sterilization is more than enough can be found here. RR even states he hasn't had a single contam that isn't due to a bag failing something else external. On top of that, his mushroom farm is at 1500m elevation so his water doesn't even get to 100°C. Of course I have tested this myself with corn, rye, oats, WBS, millet and even black quinoa and am currently over 50 successful grain jars without a single one contaminating.
If you do have a pressure cooker, just look at the chart linked above for the time that corresponds with the maximum PSI your pressure cooker reaches. Make sure that you have enough water in your pressure cooker for a long run. You don't want it running out of water and destroying your cooker in the process.
This is also the reason why cultivators use brown rice (flour) without pressure cookers. Since rice is human grade it barely contains bacteria or endospores and thus sterilizes just "fine" with 1.5-2 hours at boiling temperature. I personally found that rye/oats/WBS colonizes a lot quicker than brown rice, and is often a lot cheaper when buying in bulk. Especially whole oats from a horse feed store or farm is incredibly cheap most of the time.
You'll see people claim have success using corn or some other grain and only boiling for two hours but they will always have some absurd contamination rate like 10-25%. Your jars either come out as completely sterile or not. Having any of your jars contaminate on their own simply means you're not sterilizing properly.
⚠️ If you will be using a pressure cooker, be sure te read the manual it came with thoroughly on how to operate your model. Pressure cookers turn into shrapnel bombs if handled badly. ⚠️
If you're going with the boiling route... make sure to raise the jars off of the bottom of the pot a bit so they don't crack due to the high heat from the fire. You can use jar lids, a trivet or even a towel for this. You fill your pot until the water reaches about 50% of the jars maximum. Steam transfers heat better than water so you want that to surround the jars. You bring it to a low boil and close the lid of the pot. Set a timer for nine hours and go do something else. After about an hour or two, maybe three, the water needs to be refilled. Grab a new pot, fill it up, bring it to a boil and dump it into the pot with the jars. Depending on the size of the pot with the jars, you'll need to do this two or three times during the nine hours of sterilization. Make sure you don't boil your pot dry. The grains will burn and your jars will crack.

After nine hours are up, turn off the heat and let everything cool down. The inside of the jars will look noticeably more wet. Completely normal. The grains will soak that water back up. Shake the jars around a bit to redistribute the moisture and they'll be all good to inoculate in about six to eight hours.
Do not try and cool your jars quickly in any way. The hot air inside of the jars will "shrink" as it cools down rapidly and it will start sucking in air from the outside. Yes we have a filter, no that filter doesn't have to be stress tested by creating a vaccuum.
4. Grain jar inoculation
Requirements
- inoculant (agar, spores, colonized grains or liquid culture)
- 70% isopropyl alcohol
- (Optional) still air box
Steps
I'm not going to go too much in depth on the inoculation process. A lot can be found just about everywhere online. Just shoot your spores/liquid culture (1cc max.) into your jar, or drop some agar/grains in there really. Magic mushroom spores are legal almost everywhere in the world and since 2023 a lot of vendors began selling liquid culture. Syringes can be obtained from various websites like Sporeworks, Inoculate the World and my personal favorite; Mondo. Remember to be completely clean/sterilize during the entire process. Wear gloves. Wear a mask if you have to. Wipe everything down with 70% isopropyl alcohol. Heat the tip of the syringe with a lighter first. Cutting corners will just waste weeks of your time in the end.
⚠️ I should note that the chance of getting a clean spore syringe is very small. Since mushrooms aren't grown in sterile air, the spores from them can always carry bacteria, mold or some other nasty. The difference between a liquid culture syringe and a spore syringe is that a spore syringe holds (hopefully) sterile water with spores, while liquid culture (LC) holds a nutritious broth with live mycelium already in it. Since liquid culture can be made, sterilized and then inoculated with healthy mycelium it can be completely clean. If you can pick - I would get a liquid culture instead of a spore syringe and hope the vendor doesn't screw up. If you get a dirty syringe, contact the vendor and get a refund or demand a new one. The best you can do is go the agar route but that's notably more advanced and wont be covered in this guide. ⚠️
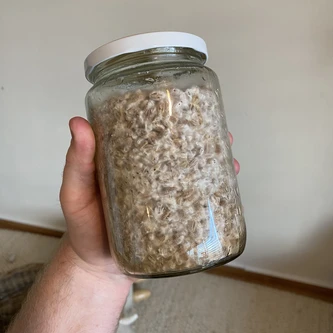
Shake your jar at about 30% colonization. Not before and not after. Shaking your mycelium will make it pause its growth for 24-48 hours so you really want to minimize it. Shaking at 30% makes sure you can cover the entire jar with inoculation points while still shaking as little as possible.
A 12/12 hour light cycle helps the mycelium growth because they have a circadian rhythm. Mushrooms don't photosynthesize so you don't need special lights like you do for growing weed. You actually have to make sure that they stay out of direct sunlight. Keep them at 24-26°C for optimal colonization rates. Another thing to note is that it's often 1°C hotter inside the jar than on the outside. If you can't provide these conditions perfectly, don't stress about it. However, do keep your jars above 18°C and below 28°C. Higher kills mycelium and lower will make it stall out, but not die.
Your jar is ready to spawn to bulk once it is 100% colonized. Not 80% and not 90%. Spawning to bulk is a non-sterile process. Spawning uncolonized grains to bulk is a easy way for contams to get a little snack on something that the mycelium doesn't have a hold over yet. This will give the contams strength and it'll become a total mess.
5. Spawning to bulk
Requirements
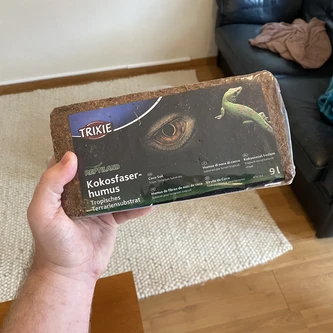
- (Fine) coco coir from the pet store if possible
- A large towel that fits over your pot
- 100% colonized grain jar(s)
- A large bowl to mix the grain and the coir
- Latex/nitrile gloves
- 70% isopropyl alcohol always helps
- Thin/cheap trash bags
- Patience (again.. I know...)
Steps
So the first thing you might be wondering is; "Everything had to be completely sterile during the whole grain jar process, and now you want me to just twist open the jar and expose it to the open air?!"
Thing is, mycelium starts out extremely weak and fragile. At that stage, any bacteria can easily beat out the mycelium and ruin your jar completely. After the colony starts increasing in size and strength, mycelium can actually make it's own antibiotics to fight contams! Guess where the penicillin we use comes from...?
Anyway, spawning to bulk is also pretty simple, although it can be pretty messy. First make sure that the coco coir you got is finely cut and is not treated with trichoderma. Coco coir that's used for potting soil is often treated with the green goblin in order to help plants grow. We have to eat our fungi. Both our bodies and our mushrooms dislike having to deal with trichoderma. Please, do not forget to overuse your 70% isopropyl alcohol as much as possible. Wipe down the jars, the tubs, yourself etc.
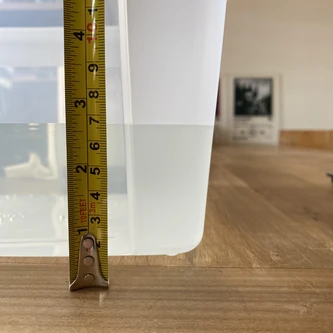
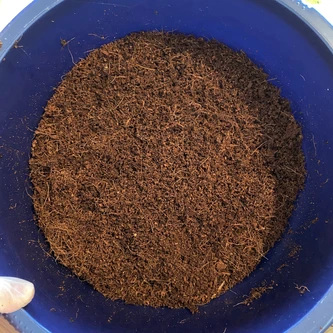
I'm a nerd so I like to measure out how much coco coir I need to pasteurize perfectly. Good ratio's are 1:1 all the way to 1:4 of grain spawn to coco coir by volume, not weight. So if I have 1500ml of grain spawn, I grab one of my tubs and fill it with about 4500ml of water. Aiming for a 1:2 ratio. Just to check how much depth the entire "cake" will have. You're aiming for about a 6-10cm substrate depth. Anywhere between that is completely fine. Undershooting can result in small harvests due to low hydration and nutrition, while overshooting is wasteful. My 650gr coco coir brick becomes 9000ml according to the label. I need at least 3000ml so I take about 220gr of dry coco coir. I add a bit more because we need to add a top layer (more on that later) and being short on pasteurized coir sucks. It's cheap stuff so I wouldn't try to go really tight on your measurements.
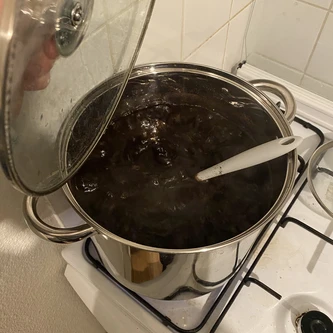
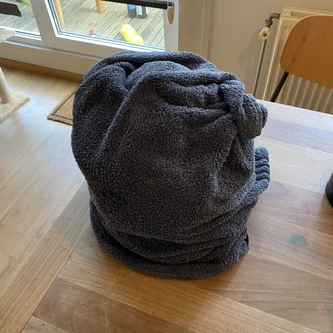
So you've got your dry coco coir all measured out. Great! Time to throw on a pot with water and get the water to a boil. I personally squeeze my coco coir to perfect "field capacity" (again, more on that later). So I skip measuring out the perfect amount of water and just add more than enough. Get the water to a boil and add your coco coir. It'll explode in volume so make sure your pot doesn't boil over. Let it boil for a couple of minutes and take it off the stove. Wrap your pot into a towel covering it completely. You're pasteurizing the coco coir, not sterilizing. This just means we need to keep it really hot, but not boiling for at least a couple of hours. Leave the coir to cool down overnight. Don't try to hurry and cool it manually because it needs that time with the heat to be pasteurized properly.
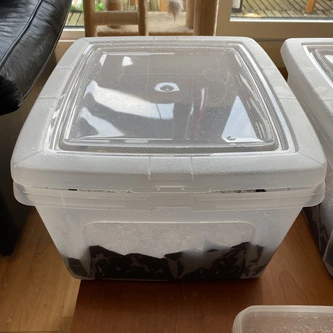
The next morning, the coir should be cooled down enough to be touched by hand. Time to create the cake. Grab a thin/cheap trash bag. You'll use this as a liner. A liner is basically just a piece of plastic between the cake and the tub. As the mycelium grows and works its wonders it will shrink the cake inside of the tub. The plastic trash bag will stick to the cake and shrink with it. This eliminates mushrooms growing on the sides and/or bottom of your cake.
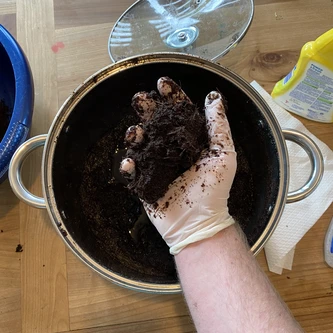
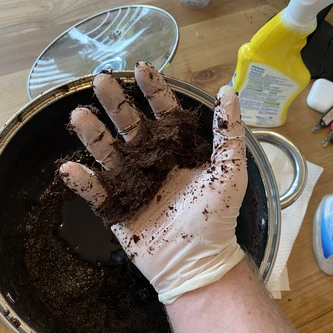
Put on some gloves and grab handfuls of the coco coir from the pot with coco coir and water. Now this is important; squeeze as much water from the coco coir until no more streams of water come out. When only drops come out, it is at perfect field capacity. If you undershoot it and keep it too wet you can get rotting/contams. If you have it too dry, well, your mushrooms will stay small and become sad. Throw the field capacity coco coir in a clean bowl. Keep grabbing handfuls and squeezing them to field capacity until you've got all the coco coir you need.
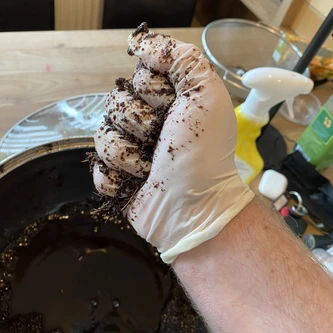
Remember when I said we only get to shake our jars at 30% colonization? Well, I lied. This is the last time we get to give them one more rigorous shake in order to get all the grains loose. Give your jars a quick smell after opening them. If they don't smell like healthy mycelium, but sour/gross or like wine (yes, wine) instead, throw it out. For the uninitiated; mycelium smells earthy and maybe a tad sweet. Like the forest after a night of raining.
An optional step that I like to do is giving my grains a quick dunk after giving them their last shake. Your grains will dehydrate quite a bit during the week(s) the mycelium colonizes them. So after having given them their shake, run the jars under the tap, screw on the lid again and let them soak up the water in the jar for ten minutes. After the ten minutes are up, open it up again and place your hand over the opening. Turn the jar around and just let the water drain out through your fingers. No shaking, and make sure not to lose any grains while doing this. The idea is that having coco coir at field capacity, and adding incredibly dried out grains will actually lower the moisture content of the coco coir, leaving it just below field capacity. As seen in this massive thread on the Shroomery by FrankHorrigan this can help with both colonization speeds and fruit size. Do not shake your jar when it is filled with water since you'll lose a lot of mycelium when draining after.

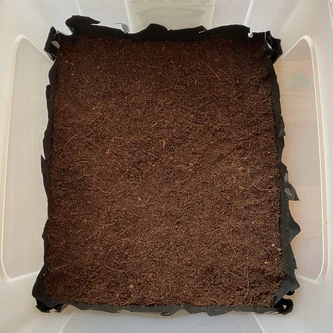
Add the grains to the clean bowl filled with field capacity coco coir. Now mix up the grains and coir all the way. Squeeze all the little clumps of mycelium apart. Lay the trash bag flat on the table and give the side that will be touching the cake a quick spritz and wipe with 70% isopropyl alcohol. It may be overkill but you can never be too clean in my opinion. Place the trash bag inside of the tub and start filling the tub with the grain/coir mix. Make sure to have your liner (the trash bag) double layered. This will allow for some air pockets between the two layers allowing it to stick to the wet tub, and the wet cake. Making sure the trash bag has an easier time shrinking. Shake it around a bit, making sure to distribute the mixture evenly. You also want as much as a flat surface as possible. Pad it down firmly.
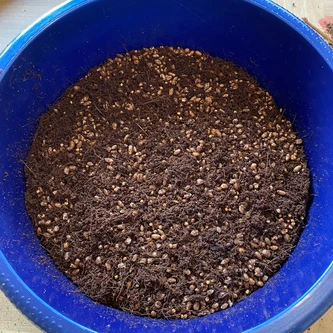

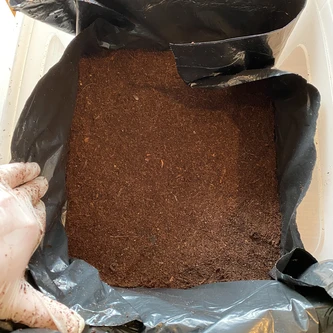
Now it's time to add a top layer. The top layer is used to protect the grains of mycelium from direct contams while the mycelium is recovering. A top layer also helps keep the surface hydrated. We can use the leftover coco coir to make the top layer. Just make sure it's at field capacity and covers the entire tub with about a 0.5cm layer of just coco coir. No more grains should be visible. Also pad the top layer down firmly. Make sure that you end up with as much of a smooth surface as possible without pressing the cake down too much.
Grab a pair of scissors or a sharp knife and cut off the trash bag so it only leaves about a few centimeters of bag above the cake. When done, give everything a nice misting. Mainly making sure to get the sides and the lid of the tub wet/moist. The coco coir is already at field capacity so don't overdo the misting on there. Close it up, making sure the lid doesn't make a complete airtight seal. If it does, leave the latches unhooked for some gas exchange.
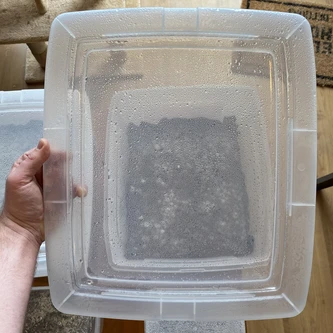
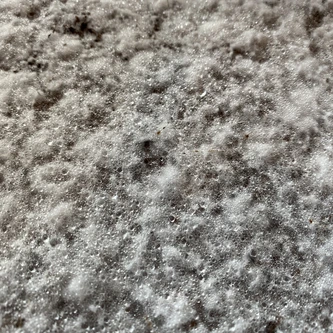
Wait until at least 90% of the cake is colonized before doing anything else. Preferably 100%. This will generally take about 10-15 days. Keep the lid closed. Keeping the lid closed is extremely important while the tub is colonizing. The sudden breath of oxygen can make the mycelium go into fruiting mode. This is what we want eventually, but not while enough is colonized so we can get a big harvest. When the mycelium gets oxygen it basically thinks it has reached the "outside of the dung pile" and has to start reproducing. Sidenote: if your tub starts pinning on its own, just roll with it and go into fruiting. This can sometimes happen if your mushrooms are early fruiters.
6. Fruiting & maintaining surface conditions
Requirements
- A fine water mister. Grab one of those that hairdressers use
- (Not really optional) a food dehydrator
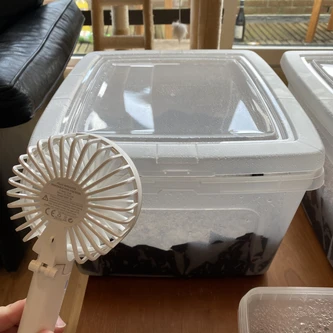
- (Optional) a battery powered hand fan is a really good buy for €10
Steps
So the tub is 100% colonized! Great! Time to crack the lid and give it a proper breath of fresh air. Now it has become time to introduce "fruiting conditions". This just means we need to trick the mycelium into going into reproductive mode. There are a couple of pinning triggers which are important to be aware of:
- Full colonization of the cake
- Steady supply of fresh air exchange (FAE)
- Evaporation of moisture from the mycelium (goes hand in hand with FAE)
- Drop in temperature
We want to give the now 100% colonized cake those triggers. This means like I said before, time to crack the lid a bit so it can get fresh air. This can be done in different ways depending on the tub. A solid way, depending on your tub, is turning the lid upside down. This will often create a lot of air gaps on all sides which are perfect for some consistent FAE. Optimally we want to drop the temperature down to 22°C. I personally don't have a spot specifically for fruiting so I just keep everything at 24°C at all times.
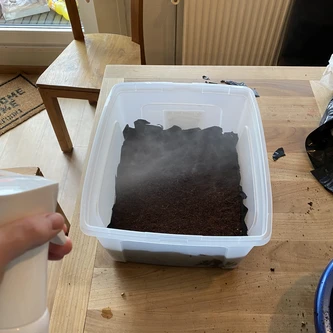
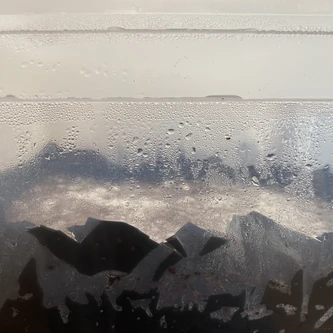
For moisture you want to maintain thousands of tiny water droplets on the surface at all times. Water lays on top of mycelium so it will create small water beads. While also keeping the sides and the lid misted as to keep some condensation going there. You're aiming for a continuous 99% humidity while still giving it enough oxygen. When misting be sure not to mist it from too close as this is kind of like punching your mycelium in the face. Point the mister up and let it drizzle down! If you ever happen to get pooling of water on the surface, don't be afraid to gently soak it up with a paper towel. Pooling can suffocate the mycelium in that area.
Now, there's a lot of different opinions on how to keep the surface conditions optimal. It's a balance between humidity and FAE. What I personally do and works for a lot of cultivators is keep the lid cracked and give it a bunch of short (5-10 seconds or so) fannings a day. Just by pointing a small hand fan to the cracked lid, or lifting the lid and setting it down a couple of times. All that is needed is some airflow to dissipate the CO₂ and get some extra O₂ in there. Frequent fresh air exchanges also really helps with developing huge pinsets. Do always keep an eye on the humidity, though. If you have to mist it daily, there's too much air flowing through there so I would say cut back on the FAE a bit. I do my fruiting with zero, maybe one misting before pins show up.
I must add, I keep my tubs in a closet with no passive airflow. This is mostly why I use a small hand fan to keep that going a couple of times a day. There's a lot of people who don't fan at all and just keep the lid cracked. Especially if you have room where you cultivate and can place a fan (not pointed directly at the tubs), or just have a little passive airflow in the area (like an open window nearby). Honestly, this is really an experience/setup thing. Beginners often give it too much FAE which will make the cake dry out. If you keep pumping in fresh air straight into your tubs, they'll dry out fast and you'll have to mist a lot more. Which is more work, but your mycelium also doesn't like being dried out and then sprayed multiple times a day. If your pins/mushrooms start developing hairy white bottom stems (fuzzy feet), they do need some more fresh air. If they're running out of oxygen they'll also grow really long with small caps, as they are "reaching" for fresh air. Your mushrooms like lacking fresh air more than lacking moisture. The general dryness/climate in your area also effects this entire process.
“I’m of the opinion that mushrooms do best when you set em up for success and then
leave them the fuck alone.”
- Pastywhyte
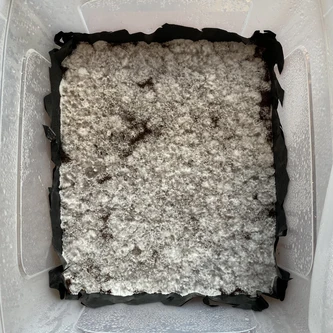
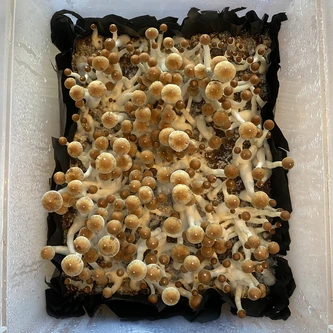
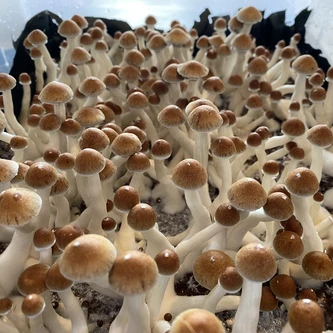
After about 5-15 days your mycelium will start making tiny white balls of mycelium called "knots". That's a heads-up for you that it's starting to pin. Just keep on trucking at this point. Those knots will slowly turn into pins!
When pins start to form you want to avoid misting them directly. Pins can abort when they get directly sprayed with water and you're not letting the water drizzle down gently. This means they turn dark/black and stop growing. The mycelium cuts them off and they can even start rotting. Definitely something we don't want. If the humidity ever gets low inside of the tub, mist sides and the bottom of the lid. Keep the tiny water beads on the mycelium at all times. Make sure you're not getting pools of water in the tub itself. You have a liner so the cake wont be directly affected, but pools of stale water inside of your tub is never a good idea.


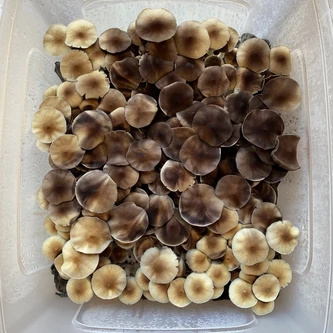
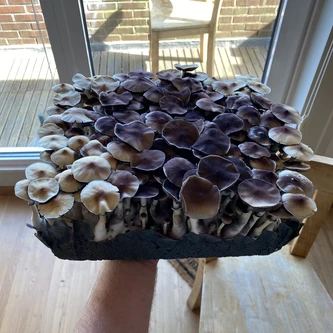
After your pins start being big and proud they'll tear their veils and open their caps. When magic mushrooms tear their veils they stop producing tryptamines which is often a good indicator that it's time to harvest them. After their cap has flattened out they'll also start making and releasing spores. Not harmful at all but they will clog up the cake and make future grows from that cake a bitch. Plus, your mushrooms will become all burnt and ugly looking. You can harvest them all at once or one by one as the veils tear. Both is completely fine. Dry them until they're cracker dry using a food dehydrator. Store them in a jar with some desiccant silica gel packets.
7. After your first flush 🚧
// TODO
8. General tips
- 70% isopropyl alcohol does a better job at sanitizing than 80% or even 99%.
- A 1:10 bleach/water mix can be used in place of alcohol for most things. Like with alcohol, don't think using a 1:2 bleach/water ratio is better. And be very careful when using bleach as it does not evaporate. If there's still some bleach left over in a jar or tub you sanitized, don't think mycelium will grow there. Bleach ruthlessly murders everything it touches.
- Fire/heat sterilizes. Alcohol/bleach sanitizes. Sterilizing is better than sanitizing so don't go wipe your syringe with an alcohol pad after lighting it up with a lighter.
- 1L jars are the best for growing grain spawn in my opinion. Going over 1L has a chance of making the bottom/inner part of the jar run out of O₂. CO₂ also has harder time escaping larger jars. Going under 1L is definitely fine, but having a bunch of jars that all colonize at different rates can be kind of annoying when you need ten of them to fill a single tub.
- If you ever need to "pause" the mycelium growth (when you for example have ten small jars) you can throw them in the fridge. The mycelium will go dormant and can last for months. Temperatures below 3°C have a chance of killing your mycelium so don't put your fridge on its coldest setting!
- Basic food dehydrators come fairly cheap. I got mine for €33 and it was definitely worth it. Using a fan can work, but it may be kind of iffy, especially when you're growing for more than just yourself. There are some (conflicting) reports of psilocybin breaking down above 70°C so I keep mine at a steady 60°C just to be safe.
- If you ever run into green contamination in a jar or tub, it's probably not worth it to try and save that container. Trichoderma constantly pumps out spores and having trichoderma spores in your house can literally ruin future grows for months. Keep the jar/tub closed and throw it out!
- Letting your jars of mycelium consolidate for a few days after reaching 100% colonization can help them fight off any potential contams they come across during spawning. It's not necessary at all, but if you're not in a hurry I would let them sit for a couple of days extra. This also applies to tubs that are colonizing. People have reported that waiting a day or two after full colonization helps with bigger harvests.
- If you have the option to keep your tubs somewhere up high, do so! You live and walk around on the ground so that air gets dirtier quicker, especially if you own pets.
- If you ever get stuck with too much pasteurized coco coir, don't be afraid to drain it a bit and throw it in a trash bag. The process stays the same. Make sure the coco coir gets a good boiling before using it again. Coco coir isn't as nutritious so contams wont like it that much. There's even stories of cultivators just using it straight from a bucket or bag after weeks. I would still boil it first because losing a grow because you didn't want to wait eight hours is a total waste.
Happy growing!
- Throwaway
9. Thank you's & references in no particular order:
- shroomery.org
- RogerRabbit
- FrankHorrigan on the Shroomery and on Reddit
- Pastywhyte
- All of RogerRabbit's notes on mushroom cultivation
- Let's Grow Mushrooms!
- Growing Gourmet and Medicinal Mushrooms
- I sent 90 Second Mycology this tek and he liked it
- Same with good old PhillyGoldenTeacher
- Chronicles of Bod
- SirPsycho on the Shroomery and on Reddit
- r/shrooms
- r/MushroomGrowers
- r/unclebens
- Drew Drozynski
- Paul Stamets for getting me interested although he's kind of a dick apparently